Pages

Wednesday 30 November 2011

豆腐蘿蔔湯


早兩天回家後,因為時差的關係,下午近傍晚的時間總是累累的無精力,提不起勁做飯,最後只叫外賣回家吃。加上上星期在日本和香港吃了不少油膩東西(天啊,已經開始懷念居酒屋、豚肉鍋、媽媽做的蒸鯇魚、上海菜...),於是決定今天晚上清清腸胃,吃點簡單的。經過超市看到白蘿蔔,於是就只做了一鍋白蘿蔔豆腐湯,雖然沒有肉類,但吃後暖乎乎的,晚上睡覺也不會開暖氣啊。


材料: (四人份量)
  • 豆腐  一盒, 約400克  (我買 Cauldron Foods 的豆腐)
  • 白蘿蔔  半條, 約400克  (Mooli)
  • 蘑菇  250克  (Forestiere mushrooms)
  • 黃芽白(大白菜)  半條  (Chinese Leaf)
  • 豆奶  1公升
  • 麻油  兩湯匙
  • 鼓油  兩湯匙
  • 海鹽  適量

做法: 
  1. 白蘿蔔削皮後切成1.5寸長的小條,豆腐、蘑菇和黃芽白也切成相若的長度。
  2. 鍋上放兩湯匙麻油後以中火預熱數分鐘,放入用廚房紙抹乾的豆腐,煮大約五分鐘,再加入豆漿。記得豆腐很軟,不能急於翻轉。要等兩分鐘後才能轉面。
  3. 豆腐煮至起泡差不多沸騰時加入蘿蔔。合蓋以中小火煮20分鐘。
  4. 加入蘑菇,合蓋煮10分鐘。
  5. 加入黃芽白,合蓋煮5分鐘。關火,完成。可加入適量海鹽調味。

我的小筆記:
  • 所有材料除豆漿外,都能在英國一般超市買到。黃芽白在眾多能在普通洋人超市找到的東方菜中算是比較便宜的,一般£1就有一大株,能煮上兩餐。
  • 今次用的是在泗和行買的楊協成原味豆奶,這豆奶本身已有糖,所以做出來的湯和豆腐有點甜,好像不太健康啊。下次會試用無糖豆奶或是維他奶的純豆漿。
  • Forestiere Mushrooms 是一種新品種,暫時在英國只有在 Tesco 買到。這種菇類味道雖然跟中國香菇 (shiitake mushrooms) 不盡相同,但同樣香濃,而且煮過後仍能保持顏色,不會變得暗淡,很適合用來做湯或是意大利飯。而且它的價錢只是同份量的中國香菇的30%,所以若不是做一些很講究香菇味道的菜,這種Forestiere菇是不錯的代替品。
  • 我用的是 Le Creuset 30cm 淺鍋 (英國叫 shallow casserole dish,美國叫 buffet dish),這只鑄鐡鍋以中火去燒,大約要4-5分鐘才夠熱。檢查鍋子熱度的方法是隔著碗布以手背觸摸鍋子兩邊的手柄,若感到熱那就代表ok了(這方法其實是另一鑄鐵鍋牌子Staub的職員教我的)。
  • 製作時間: 約1小時
  • 主材料成本:  £6

Tuesday 29 November 2011

黑糖桂圓薑母茶


(還有好幾篇旅行前做的菜的筆記要後補啊... 但先寫下這篇比較容易的! er... 其實這也不算是甚麼食譜... 咳咳,但算是留個記錄,方便健忘的我遲些再參考! 相片不是有意拍成這種黃黃的裝moody,只是我還不太懂得用新買的閃光燈啊!)

十多天的假期轉眼間就結束,昨天終於拖著幾十公斤的行李回到倫敦。回家後第一個感覺不是「很冷」,而是「很很很很冷」! 倫敦的溫度要比香港和京都低十多度,的確很難適應。這兩天外出時雖然穿上羽絨大衣,還是被低溫寒風吹得頭痛,險些著涼,就算賴在家中也像待在冰箱一樣,整天開暖氣也不是辦法,於是決定做點暖身飲品,希望讓這冬天過得暖暖的。

材料: (兩只麥克杯(mug)的份量, 約600毫升)
  • 黑糖  10-15克 (muscovado sugar)
  • 薑  2片(連皮, 每片約半公分厚, 共約10克)
  • 桂圓  5粒 (龍眼乾, dried longan)
  • 水  1公升

做法: 
  1. 薑切片洗淨,用刀背或刀柄拍打數下。
  2. 把1公升清水放入小鍋子中,沸騰後放入薑片,煮5分鐘。
  3. 加入黑糖和桂圓,輕輕攪拌,再煮5分鐘。完成。

我的小筆記:
  • 桂圓本身有甜味,不嗜甜的人可考慮不加入黑糖。嗜甜的也可在薑母茶煮好後再加入黑糖調味。另可依個人喜好加入紅棗。
  • 能吃生薑辛辣的人可以在水還冷未沸騰時就下薑,也可以延長煮薑的時間。
  • 據說從中醫的角度看,平日飲用薑母茶能驅袪風寒,促進血液循環,有助預防風寒感冒。不過,發病以後反而不能飲用,性熱的薑母茶(或其他補品)會幫倒忙,令喉嚨乾燥發炎的問題更嚴重。
  • 英國有很多不同種類不同顏色的糖,上網查了很久,最後的結論是 muscovado sugar 最接近華人口中的黑糖。因為兩者都是經過最少精煉的粗糖,擁有比其他糖更多的營養,只不過中港台日的黑糖都愛以壓成磚頭小塊一樣去賣。另一種在英國常見的有色糖是 demerara sugar,也是啡色的。除了顏色較 muscovado 淺一點,最重要是質感不一樣。muscovado 在製作時用糖蜜煮過,所以比較濕潤,有種接近焦糖一樣的香味(不過也有人不喜歡那種味道的)。但 demerara 比較乾身,而且糖粒晶體較大。
  • 另外,現在超市賣的 muscovado sugar 有時會分為 dark 和 light 兩種,light 的氣味和顏色比較淺。但用dark muscovado比較好,因為這是傳統的 muscovado,比較適合做西式烘焙點心,而且糖的顏色越淺,代表越精煉,所以所含的營養和礦物也會較少。
  • muscovado sugar 開封後必須要放在密封的瓶子內,甚至放入雪櫃中,否則跟空氣接觸後會變得很硬。可以放一塊濕布或是一片蘋果或馬鈐薯在硬了的muscovado上,這樣有助糖粒變軟。(其實沖薑母茶糖變硬結晶了不要緊,放在熱水中攪拌幾下就好了。但若搓麵糰做蛋糕麵包可就麻煩大了!! 我就有這麼的一個慘痛教訓。)
  • 製作時間: 約15分鐘

Wednesday 16 November 2011

Melting Moments 牛油曲奇


早陣子在BBC有一個節目,叫 The Great British Bake Off,是一個全英國的業餘烘焙比賽。每週都有不同的主題和三個不同的比賽項目,由兩位評判選出最弱的1-2位淘汰出局。我是這個節目的fan,除了每集追看,後來看到節目內部份食譜被收錄成書,就立刻忍不住買了回家。

其中一個食譜叫 Melting Moments (中文大約可譯為「融化的一剎」吧),這其實是一種頗傳統的英式牛油曲奇。這種曲奇一般不叫 cookies 而稱為 shortbread,很多年前在香港第一次在超市買到包裝式的 Shortbread,只覺名字很奇怪,為甚麼要叫「短麵包」呢? 因為它小小的短短的一條嗎? 最近看了一些烘焙書後,才知道 short 在古代的意思是「脆的、易碎的(crumble)」,甚至到現在也會看到有人用 short 去形容甜點的質感。shortbread 叫 shortbread 自然就是因為這種易碎的、鬆化的迷人口感吧。

正如名字所說,這種曲奇一放進口,就鬆化得立刻像融化一樣,吃過一塊後就明白一點也不誇張,跟紅茶配搭吃起來就更完美了。我想這是我做過的曲奇中最讓我滿意的,唯一的缺點是這種曲奇要用上很多很多的牛油,不能吃得過量啊!


參考食譜:
"Melting Moments" from Great British Bake Off.

材料: (約36-40塊曲奇)
  • 麵粉  250克 (plain flour)
  • 粟粉  60克 (corn flour)
  • 糖粉  60克 (icing sugar)
  • 無鹽牛油  250克 (unsalted butter)
  • 香草精  1茶匙 (vanilla extract)
  • 牛奶  微量


做法: 
  1. 一小時前將牛油至雪櫃取出,在室溫中放軟。將麵粉和粟粉混合好,過篩。
  2. 以一張A4紙畫上12個直徑約3.5至4厘米的圓形,我用了一個小小的圓型玻璃蠟燭台作模。每個圓型之間最好留上4厘米(或1.5寸)左右的距離。
  3. 牛油切小粒,加入糖粉打發至鬆軟,顏色變淺。以電動打蛋機大約需要5分鐘,手打大約要15-20分鐘。加入香草精後再打發幾秒至均勻。
  4. 將篩過的麵粉和粟粉拌入打發好的牛油中,若此時麵糰太硬,可加入微量牛奶打發,否則很難從擠花袋擠出曲奇。拌好後放入已套上大星型花咀(star-shaped nozzle)的擠花袋(piping bag)中。
  5. 將畫有圓形的A4紙放在焗盤上,再放上牛油紙,以擠花袋擠出跟圓形差不多大小的麵糊。完成後放入冰箱急凍櫃(freezer)待15分鐘。這可以避免曲奇在烘焗時變形,幫助焗出來的曲奇保持漂亮的形狀。
  6. 預熱焗爐至180度(Fan),將焗盤放入焗12分鐘。
  7. 出爐後先待幾分鐘,然後小心將曲奇連牛油紙放在架上待涼(因為很易碎啊!),再放入存氣的盒子內。


我的小筆記:
  • 十分十分十分的好吃。真的。這麼多牛油的曲奇,怎能不好吃?!
  • 這種曲奇的保鮮期很長,我做好後當天用密封盒子帶了回香港讓父母嚐嚐,吃了幾天還是非常鬆脆,口感不變。而且成本很低,做40塊曲奇的材料才要£1.5。
  • 注意,這麵糰很硬,絕對不能用即棄的膠擠花袋,因為連我的尼龍擠花袋,最後也被弄破了,下次再做必須要再多加一點牛奶。若沒有厚身非即棄的擠花袋,可考慮不加牛奶,用桿麵棍 (rolling pin) 桿開再用曲奇模套出形狀。
  • 另,這種麵糰可滾成圓柱狀後用保鮮紙包好,放在冰箱上待一兩個月。想要吃的時候才拿出來解凍,再用刀子切成薄片,拿到焗盤上即焗即吃。
  • 我家的冰箱不算太小,但長年也有其他東西,哪有空位一次過將三盤曲奇放進冰箱freezer中呢? 我想出了一個方法: 就是每一次只放一盤,待拿出那一盤放到入焗爐中時,才放另一盤入冰箱。12分鐘後第一盤烤好了,從焗爐拿出來後,又會再等幾分鐘才搬到架子上待冷。這時候第二盤曲奇也就冷藏夠,可以入焗爐了。用這個方法,無論焗多少盤曲奇也不怕冰箱沒位置。
  • 製作時間: 約1小時
  • 主材料成本: 大約£1.5

Tuesday 15 November 2011

橙香雞翼


首先要說明,這食譜是誤打誤撞地弄出來的! 事緣是,上星期我趁超市減價買了一支君度橙酒,打算用來做甜品,但暫時仍未想到要弄甚麼。今天買了雞翼回家,偶爾打開廚櫃門看到那支橙酒,就想,不如試試用它來煮雞翼? 橙跟鴨是非常相配的組合,或許跟雞翼也可以? 於是在Google上找了幾個用君度酒或橙汁做的雞翼或雞胸食譜,但沒有一個合心意的,例如,我不喜歡用雞粉做菜,又,因為要用壓力鍋,食譜中的汁料或水份不能太少。最後決定自己做,邊做邊調味。幸好結果還挺讓人滿意的,橙酒、橙汁和雞翼真的挺搭檔啊,我們一頓晚餐就吃掉了九隻雞翼。唯一的不足之處是最後舖上雞翼面的橙皮茸份量太少。

材料: (二人份)
  • 雞全翼  9隻(約800克)
  • 橙  1個(取橙汁約60毫升)
醃料:
  • 糖  1/2茶匙
  • 鼓油  1湯匙
  • 君度橙酒  1湯匙 (Cointreau)

做法: 
  1. 雞翼洗淨以廚房紙抹乾,加入醃料拌勻,醃1.5小時。
  2. 橙皮磨成茸,再將橙搾汁(一個中型橙大約可得60毫升橙汁),備用。
  3. 雞翼每面以小火煎約1分鐘或成金黃色。
  4. 將雞翼和剩下的醃料放入壓力鍋,另加入橙汁和1湯匙鼓油,關蓋。
  5. 壓力鍋調至1號(較低壓力),開中火加熱,當壓力計升至綠線後調低至小火,煮10分鐘。
  6. 關火,待壓力鍋自然減壓後,即可將雞翼盛起上碟,在上面加入橙皮茸。

我的小筆記:
  • 我們的小實驗證明,加上橙皮茸的雞翼味道比沒加的要好吃。橙味更濃烈,酸酸甜甜的好像讓雞肉的味道更突出。但今次用的橙皮茸份量不足,下次應該用兩個橙才足夠。
  • 因為用了鼓油,這個菜比較像香港的家常菜。本來有想過用法式料理的方法以牛油和麵份打汁的,做出來應該不錯,但卡路里的脂肪量就要超標了。權衡輕重後,還是放棄做牛油汁的念頭。
  • 醃料用了一湯匙的君度酒,雞翼煮出來後的酒香很濃。我們兩口子比較能接受重酒味的菜式,若不太喜歡酒香的可以減少君度酒的份量。但這樣做若用壓力鍋的,必須要加額外的水份或橙汁,否則汁料的水位會太低,達不到壓力鍋最低水位的要求。
  • 準備時間: 約2小時 (醃雞翼、準備橙汁和橙皮)
  • 烹調時間: 約20分鐘
  • 主材料成本: 大約£2

Friday 11 November 2011

莓子慕絲


今天晚上到好友wings家中作客,本想做一個慕絲蛋糕(像三文治般由兩塊海綿蛋糕夾著慕絲)。但因為時間不夠的關係,慕絲未定型,於是我將慕絲倒在玻璃碗中送過去了。幸好這個莓子慕絲味道不錯,當成一個獨立甜品也不算太失禮。剩下的一小部份,我另外用一個矮身的平底玻璃杯裝著留在家中,留待明晚吃囉。

其實做水果慕絲主要的材料不過幾種: 水果、蛋白、糖(幼紗糖和糖粉)、鮮奶油和魚膠粉。技巧方面不太困難,只是在煮水果泥時要控制甜度,打蛋白時要注意起泡狀態。不過,因為要用生蛋白,所以若情況許可,應該盡量用新鮮和有機的雞蛋。

平日做莓子甜點,我都會用新鮮莓子。但隨著秋冬的來臨,超市賣的英國莓子,已漸漸由南美洲莓子取代。一向我都盡量不吃歐洲以外入口的蔬果或鮮肉,總覺為一己的口腹之欲,吃千山萬水乘飛機乘輪船來的食物,好像不太環保。幾星期前有次因為烘焙課需要,無奈買了一些阿根廷藍莓和覆盆子(raspberries),但味道真的不怎麼樣,跟英國夏季的新鮮莓子絕對不能相比。於是今次做慕絲,我就嘗試用急凍莓子。以前總以為急凍水果營養價值一定不如新鮮的,但看了幾個網頁後才發現急凍的可能更好,因為急凍莓子都是在樹上熟透後被立即採摘然後急凍的,比起未熟就要上貨車、在路途上「焗熟」的新鮮莓子,可能還要有營養、更美味一點呢。

原食譜: "Iced Berry Mousse Cake" from BBC Goodfood.


材料: (六人份)
  • 500克急凍莓子
    (我用了黑莓 blackberry、覆盆子 raspberry 各250克)
  • 3片魚膠 (約5克,gelatine leaf)
  • 3.5隻蛋白
  • 160克幼紗糖(castor sugar)
  • 300克鮮奶油(double cream)
  • 一點點他他粉(a pinch of cream of tartar)

做法: 
  1. 將魚膠片放入一碗冷水中。
  2. 將黑莓和覆盆子放在鍋子中,以低溫加熱至沸騰。
  3. 加入糖粉調味,不要過甜,糖粉加至莓子醬剛剛不酸、略帶很輕微的甜味就可以了。我加了八個滿茶匙 heaped tsp 的糖粉,但不同季節、產地、種類的莓子甜度不一,所以這部份還是要靠自己去試味。
  4. 以攪拌器(stick blender)攪爛成大約一杯(250毫升)份量的莓子醬。
  5. 將浸軟的魚膠片撈起,放入莓子醬中攪混後,放涼備用。
  6. 將蛋白加入他他粉以中速打至濕性發泡(soft peaks,也就是將打蛋器拿起時,碗內的蛋白會有一個尖峰,但尖峰頂端會軟軟垂下,搖動和傾側碗子時,蛋白霜會輕微流動)。
  7. 分4次將幼紗糖加入,轉成高速繼續攪打至乾性發泡的狀態(stiff peaks,也就是將打蛋器拿起時,碗內的蛋白能直立向上、不向下垂)。這時候的蛋白霜會有一層珍珠般的光澤(看下圖,很漂亮啊,對不?),把盛蛋白的碗子倒轉,蛋白也會貼著碗底,不會倒下。

  8. 拌入已經放涼的莓子醬和鮮奶油,輕輕拌至完全拌勻,再倒入容器中,在表面貼上一層保鮮膜(要緊貼慕絲),避免表面結霜影響口感。放入冰箱冷藏數小時即可食用。

我的小筆記:
  • 應以不鏽鋼或其他不易跟酸性產生化學反應的鍋子去煮莓子醬。一般的鋁鍋或鐵鍋會跟酸性產生反應,令鍋子生鏽並產生怪味道。
  • 煮莓子醬時不要加過多的糖粉,否則跟蛋白霜混合後,就會變得過甜。
  • 原食譜只用三隻蛋白,但我看到不少人的評語說慕絲沒法固定(set),所以我額外多加半隻蛋白。我的經驗是裝在大碗中的慕絲,近三小時也未能固定,但裝在小杯子中的慕絲,大約用兩個半小時就能固定了。不過若要做蛋糕夾心層,這個食譜做出來的慕絲硬度好像還是略嫌不足。
  • 原食譜只用150克幼紗糖,但因為我多加了半隻蛋白,所以我多加了10克紗糖。根據幾個在網上和書本上找來的蛋白霜食譜,打瑞士蛋白霜(也就是最普通的蛋白+紗糖在室溫中打發)所需的比例大約是每隻大蛋需要45-50克紗糖。(注意,英國的大蛋跟其他國家的標準可能不同)。
  • 他他粉有助蛋白打發,也能穩定打起的泡沬。
  • 我打蛋白霜的習慣是,打至最後當蛋白霜開始出現光澤時,我會改為用慢速或者人手去打,這樣比較不那麼容易打過頭。這方法是我從好幾個外國的烘焙網誌中學過來的,不過我也看過有幾個台灣的烘焙愛好者持相反意見,說若打蛋白霜中途停頓或減速,蛋白霜會不穩定很容易消泡。我個人的習慣是會邊打邊停邊查看的人,暫時也未試過蛋白霜消泡,所以我應該會繼續用這個方法。對於東西方烘焙愛好者不同的意見,我懷疑跟外國烘焙者多數會加鹽或他他粉打蛋有關係,但我不太肯定。

  • 若想慕絲口感更幼滑,可將莓子醬過篩,篩掉莓子的種子後才混合到蛋白霜中。
  • 製作時間: 約1小時
  • 主材料成本: 大約£6


Thursday 10 November 2011

松露朱古力


前天上烘焙課後,還剩下大約250毫升的鮮奶油(double cream)。鮮奶油這東西很麻煩,打開以後一定要在兩三天內用,否則很快就會變壞。吃了前天剩下的泡芙後,又實在不想那麼快再做奶油蛋糕。想來想去,決定試試做松露朱古力吧!

其實所謂松露朱古力,就是甘那許朱古力醬(Chocolate Ganache),即一般淋在朱古力蛋榚上的朱古力醬(雖然比例方面淋在蛋糕面上的甘那許含較多鮮奶油質感較稀薄),就是把鮮奶油煮熱,淋到朱古力上攪拌而已,叫作「松露」是因為它撒上可可粉後的模樣,像極了那種矜貴的菌類吧。

我想做松露朱古力最難的部份,應該就是要把朱古力醬搓揉成圓球的樣子了,搓揉太多太久朱古力會溶在手指間,搓揉不夠松露又不夠圓。最後,在兩者之間,我選擇了後者 -- 因為我實在受不了滿手朱古力醬的感覺! 不夠圓就不夠圓吧,反正不是送禮的,能吃掉就可以了。又,其實有點奇形怪狀,反而更像松露吧... (自我安慰中...)

下次有機會才再試試做出比較漂亮的小圓球吧。


參考食譜:Christine 簡易食譜的「松露朱古力
食指大動 Food Funs 的 「甘那許松露巧克力


材料: (約22個松露朱古力)
  • 100ml 鮮奶油 (double cream)
  • 200克 朱古力 (我用大約45-55%的牛奶朱古力和香橙香料朱古力)
  • 14克 牛油 (butter)
  • 1湯匙 可可粉 (cocoa powder)

做法: 
  1. 將朱古力用利刀切碎後,放入一個大碗子中。
  2. 將鮮奶油和牛油倒進鍋子中,以小火煮至沸騰後,迅速離火,倒入裝有碎朱古力的碗子中。
  3. 攪拌至朱古力完全融化後,放入雪櫃(沒那麼冷的fridge)冷藏1小時或至礙固。
  4. 以小茶匙刮出拇指大小的朱古力,滾圓後(ok,我知道很難的,姑且試試吧)放到牛油紙上(baking paper, grease-proof paper 或 parchment paper)。
  5. 以幼篩(fine sieve)篩下約一湯匙的可可粉,放回雪櫃冷藏。
  6. 松露朱古力在密封盒子內可放上3天,在冰箱冷藏庫(freezer)更可放上1個月。


我的小筆記:
  • 若雙手溫度太高,可以試著以一片牛油紙隔著搓揉。
  • 一湯匙的可可粉足夠覆蓋22粒朱古力,若篩子不夠幼細,可可粉篩至中途會篩完,可以將牛油紙上的可可粉,再重新倒進篩子內再用。
  • 朱古力和鮮奶油的比例沒有一定的規則,鮮奶油比例越高,松露的質感就越軟越濕。大部份食譜的比例,大約是每份鮮奶油對2份甚至3份朱古力,但有些外國食譜(尤其是英國的)好像都偏向濕軟的口感,鮮奶油和朱古力比例可以低至1比1呢!
  • 若以更高純度的黑朱力製作,若再滾上可可粉,出來的松露朱古力可能會蠻苦,可考慮在外層滾上糖粉(icing sugar)、杏仁粉(ground almond 或 almond flour)或其他果仁碎。
  • 製作時間: 約1小時
  • 主材料成本: 大約£4

Wednesday 9 November 2011

檸檬小蕃茄焗魚


我不懂怎樣去魚鱗和去魚內臟,一般只會買已處理好的魚柳。超市的魚販通常會將魚柳及一塊有調味和香料的牛油,放入一種即焗鍚紙包(ready-bake bag)中。我這名懶主婦一直做的,不過就是回家用叉子在鍚紙袋上刺幾個氣孔,連魚帶包拋入焗爐焗25分鐘,之後拆開包裝倒到碟上去。

當然,現在的我是個發奮上進的主婦啊(勉強算是吧~?!),所以今天下午經過魚檔時,就雄心壯志地想,或許,不過是或許,我可以嘗試擺脫鍚紙即焗包,嘗試自己煮一次魚? 於是我就立刻用電話查看 BBC Goodfood 網站,看了好一會,連魚販大嬸都問了我兩三次「有甚麼需要幫忙嗎?」,最後找來這個最最簡單的「檸檬焗鱈魚」的食譜。原食譜要自己做黃豆蓉,但我在洋人超市找不到黃豆,所以烚了扁意粉 (tagliatelle) 伴著吃,這也就更簡單方便一點了。

這食譜雖然簡單,但味道不錯。小蕃茄焗過以後甜得不得了,再加上檸檬皮,感覺清新不油膩,不單比從前用牛油焗的感覺健康得多,也好像更能吃出魚柳真正的鮮味。


原食譜: "Lemon cod with Basil bean mash" from BBC Goodfood.


材料: (二人份)
  • 連枝小蕃茄1盒(約30個) (cherry tomatoes on vine)
  • 魚柳2片 (我用鱈魚cod 和海鱸 seabass)
醃料:
  • 檸檬一個
  • 鹽 (我用 Waitrose Heston 的 胡荽玫瑰鹽)
  • 白胡椒粉
  • 乾洋芫荽(巴西利 curled parsley)
  • 橄欖油

做法: 
  1. 焗爐預熱180度。在焗盤上噴上橄欖油。
  2. 洗淨魚柳,以廚房紙抹乾。
  3. 洗淨檸檬後原隻磨皮取茸(一個檸檬大約可以磨到1湯匙的檸檬皮)
  4. 小蕃茄輕輕擦上適量的橄欖油和鹽,放在已噴油的焗盤上焗5分鐘。
  5. 取出焗盆,將小蕃茄移至一旁,在焗盤上噴更多的橄欖油。
  6. 放上魚柳,撒鹽、白胡椒粉,乾洋芫荽和檸檬茸,焗12分鐘。

我的小筆記:
  • 小蕃茄擦醃料時不能太用力,否則很容易脫落,連枝蕃茄就不再連枝了! (其實味道沒分別,但連枝連梗上碟的賣相比較可愛耶~)
  • 我用了兩種魚柳: 鱈魚和海鱸。在亞洲,據說有些商人會把海鱸稱為鱈魚買(台灣賣的「圓鱈」其實就是海鱸),我一直也不太肯定兩者的分別,所以就刻意各買了一片。同時吃過兩種後,覺得它們其實大不相同。鱈魚較嫩滑也較多油脂,質感用筷子夾起來像棉花小球一樣; 海鱸的肉好像比較「薄」一點,夾起來比較容易碎成小片。我想我覺得鱈魚好吃一點。:)
  • 準備 + 烹調時間: 約30分鐘
  • 主材料成本: 大約£6

Tuesday 8 November 2011

泡芙


前天週日下午,到友人家作客玩「戰國風雲」,再趁一年一度的Guy Fawkes Night 到公園玩煙火。本來想一顯身手,做些漂亮的泡芙帶過去做伴手禮,可惜失敗了,最後只得急急忙忙烤了一打半杯子蛋糕應急去。雖然大家都喜歡杯子蛋糕,但想起自己的失敗,就傷心了好一陣子。

基於前天的失敗,今天上烘焙課要做泡芙時,就不禁有點擔心。加上大家都要爭分奪秒地搶用爐頭和擠花袋,真的讓我做得精神緊張起來。幸好最後成品不錯,泡芙都能維持形狀,沒有過早洩氣,導師還誇奬我的朱古力醬沾得很平滑光亮。美中不足的是,我的香緹奶油(creme chantilly) 好像打過頭(overbeaten),有點一塊塊豆腐碎的樣子,不再柔滑,很可惜啊。

另外,泡芙英文叫作 puff,但做泡芙用的麵團英文叫choux pastry (choux發音像英語的shoe,是法語椰菜的意思)。傳統的 choux pastry 並不用任何發粉幫助提升,只靠麵團內包含的水份,在焗爐高溫下化為蒸氣,令泡芙如汔球一樣膨脹起來。但如何讓泡芙順利脹起來,不會衝破表層,也不會太快洩氣,就是做泡芙最難的地方。坦白說,雖然我看了很多理論,今次也僥倖也焗出樣子可以的泡芙,但在實際製作上根本就沒多大的信心。我想這技巧只能靠多練習才能掌握的,不過這種甜點每次做的份量都不少,但又不能存放太久(就算放在密封盒子內,兩天後也會變稔變軟身,口感大大不如)... 所以我想我也沒太多機會再做吧。

原食譜:"Éclairs" from Tower Hamlet Idea Store 烘焙課初班.

材料分為三部份:

材料一(泡芙, Pâte à choux, Choux Pastry)
  • 250ml 水
  • 100g 牛油或植物牛油 (butter or margarine)
  • 150g 麵粉*
  • 約4.5隻 雞蛋*
  • 一小把鹽和幼紗糖(castor sugar)

材料二(香緹奶油, Crème Chantilly, Chantilly cream)
  • 250ml 鮮奶油 (double cream)
  • 1茶匙 香草精 (vanilla extract)
  • 2 湯匙 糖粉 (icing sugar)

材料三(朱古力醬, Chocolate Glaze)
  • 100g 朱古力


做法: 
  1. 焗爐預熱200度。
  2. 先製作泡芙: 將水和牛油放在鍋子內,以中火加熱至沸騰,不時攪拌,直至牛油完全融化。
  3. 將麵粉和鹽一口氣加入鍋子中,以木匙用力攪拌,直至麵團漸漸向中心聚合,週邊離開鍋子。麵團顏色變得微黃,也會開始散發熟麵粉的氣味。若麵團太過濕或太過油膩,可著量加點麵粉。
  4. 整鍋離火,分批加入雞蛋拌勻。繼續攪拌直至提起木匙時,匙上的麵糊會向下形成一個小小的三角型。
  5. 將麵糊裝到擠花袋中,擠成長條("閃電泡芙" éclairs)、圓球(profiteroles)或其他形狀。再以濕的小刀在泡芙上劃一兩下,這可以避免蒸氣弄破泡芙表面。
  6. 直徑1.5寸的圓泡芙或長約2寸的長條泡芙,大約在200度焗25-30分鐘後,放涼待用。
  7. 製作內餡的香緹奶油: 將鮮奶油、香草精和糖粉一起打發至硬性發泡(stiff peak),裝入擠花袋中。
  8. 製作外層的朱古力醬: 用一個小鍋燒小半鍋熱水,在鍋子上面放一個大碗子,注意大碗子不能接觸到鍋子內的水。將朱古力弄碎,放入大碗中慢慢煮至完全熔化,間中以木匙攪拌。


  9. 製作小圓球泡芙(profiterole): 以小手指或刀子在泡芙底部弄一個小孔,插入擠花咀,慢慢擠入鮮奶油。另一個方法是在泡芙中間切開一半,直接將鮮奶油擠進去,若以雪糕作內餡,也是用這個方法。之後可以在表面淋上朱古力醬。
  10. 製作長條型泡芙(eclair): 跟profiterole類同,可分別在泡芙的一端插入擠花咀,或用刀子切開一半。之後將泡芙背面浸在朱古力醬中再拿起。
  11. 將泡芙放入冰箱內讓朱古力凝固 --> 完成!


我的小筆記:
  • 傳統的泡芙麵團是不加任何泡打粉(baking powder)或蘇打粉(baking soda)的,只是單純以麵團內的水份,在焗爐高溫下化為蒸氣,令泡芙膨脹起來。但不少食譜會建議加上少量泡打粉,令表皮較鬆軟,但不會幫助泡芙膨脹的。
  • 煮水和牛油的鍋子,務必要加熱至沸騰! 這是我第一次做時失敗的主因 -- 我當時用FCI的食譜,它千叮萬囑說千萬不能讓牛油水沸騰,說會改變水和牛油的份量。所以我那次的牛油只以低溫煮至融化,並沒有沸騰。後來發現麵糊一直不對,水份還是太多(雖然那食譜的水份比現在這個少),而且加入的麵粉好像不夠溫度去煮熟,所以焗出來的泡芙轉眼間就洩氣。
  • 不同形狀和大小的泡芙烘焙時間不一樣,焗泡芙跟蛋糕一樣,不能中途打開焗爐(起碼要過了75%的時間才能打開焗爐),所以體積相差很遠的泡芙需要分開焗。
  • 加雞蛋至麵糊時,最好先把雞蛋打入量杯,再分成4-5次加入。不要加得過多,否則麵糊太稀會膨脹不起。
  • 我的香緹奶油只加了1湯匙糖粉,其實不太夠甜,下次再做應該要加2湯匙。
  • 我只用了72%的黑朱古力去製作朱古力醬,也可用牛奶朱古力,或混入奶油或糖粉。
  • 有不少食譜都建議用高筋麵粉(bread flour, strong flour)做泡芙,因為做出來的麵皮較有彈性,表皮也沒那麼容易被中心衝出來的水蒸氣弄破。我上次自己在家裡做就用上高筋麵粉,不過我不喜歡那種麵包皮似的口感,而且在攪拌麵團的過程中已令麵團有一定彈性,所以我個人覺得用一般麵粉(plain flour, all purpose flour) 也可以。
  • 用擠花袋時必需要一氣過擠完一條或一個,否則泡芙內的會有「間隔」,不是一個完整的空間。
  • 除了圓型和長條型,我也試做了一些心型和水泡型的,蠻可愛的啊!
  • 製作時間: 約2小時
  • 主材料成本: 約£3

Monday 7 November 2011

Sukiyaki


I had been reading a lot about cookware in the last few months. After understanding the pros and cons of different materials (Cast iron, Anodized aluminium, Stainless steel and copper-core), I reckoned I want... Nah, I mean WE NEED a cast iron pot for braising and slow cooking. Last Saturday, we went to the Le Creuset outlet in Bicester Village in Oxfordshire and came home with a few cookware and stoneware. 

I felt so obliged to utilize my new acquisitions so I looked up in some cooking blogs written up especially for cast iron pots. After stuffing ourselves up with pizzas and KFC over the weekend, hubby and I were quite determined to have some Asian food tonight. Among a few recipes I found from Le Creuset blog in Taiwan, this sukiyaki is definitely the easiest and quickest. And Enoki mushroom just happens to be my hubby's favourite! I couldn't find any reason not to do it.

Sukiyaki is a Japanese dish in hot pot style. Sliced meat along with other vegetables are slowly cooked in a shallow iron pot. Traditionally it should be slowly simmered at the table, but we couldn't be bothered to take our portable butane stove out,  so I just finished cooking it in the kitchen and brought it out on the coffee table. It's just a perfect dish to warm our stomachs in cold winter's nights. :)


Adapted from:
"日式壽喜燒" from 幸福的味道.


My Ingredients: (Serves 2)
  • 300g hampshire breed free range pork shoulder steak, sliced
  • 160g enoki mushrooms (金菇)
  • 250g portabellini mushrooms
  • 1 small Pak Choi (小棠菜)
  • 1 box (396g) tofu
  • 1 salad onion (spring onion)
  • 2 medium tomatoes
  • 2 eggs
To make Sukiyaki Sauce:
  • 60ml dark soy sauce
  • 30ml mirin
  • 200ml water, plus extra
  • 2 tbsp of Oil
  • a pinch of sugar

My Method: 
  1. Add 2 tbsp of oil in the pan over medium high heat. When the oil is sizzling, add the chopped salad onion. Stir-fry for about 1 minute. Then add soy sauce, mirin, 200ml of water and a pinch of sugar to make the sukiyaki sauce.
  2. When the sukiyaki sauce is boiling, stir in pork shoulder slices and fry for about 5 minutes or till the pork is half cooked and turns white. Move the pork to one side of the pan.
  3. Add enoki mushrooms, portabellini mushrooms and tofu to cook for 5 minutes. Add more water if necessary to make sure the ingredients are all covered and soaked.
  4. Add Pak Choi and tomatos into the pan. Turn the heat down to low. Cover the pan with the lid. Allow to cook for 5 minutes.
  5. Serve immediately by taking the whole pot to the table. Remember to put a trivet to protect the table from heat damage. Crack an egg into each bowl, beat it briefly, pour a spoon or two of sukiyaki sauce from the pot and dig in!
One-line Verdict:
Easy peasey! Slightly more expensive than an average home-cooked meal but it's a perfect dish for cold winter nights.

    My Note:
    • I used a cast iron shallow casserole. A big flat fry pan can do too. Should NOT use wok or saucepan otherwise the ingredients would be mixed together.
    • This is a totally flexible recipe. We can just change the amount and type of meat and vegetable as we wish. For additional carbohydrates, Udon or noodle can also be added together with the mushrooms.
    • Pork shoulder is my favourite cut in UK. It's full of flavour and not as fatty as the equally flavoursome pork belly. Also it is very inexpensive. It usually costs 35-65p per 100 grams, which is a lot more affordable than other prime cuts.
    • Mirin is a Japanese alcoholic staple ingredient made from glutinous rice. It has a distinct sweet flavour to give meat a sheen and tone down the fishy smell of seafood. I got mine from Tesco.
    • Portabellini mushrooms are young specimen of Portabello mushrooms. It has a nutty flavour and tastes quite distinctly different from Shiitake mushrooms.
    • The name Pak Choi can be a little bit confusing in UK are commonly known as Siu Tong Choi (小棠菜) in Hong Kong. or Little Pak Choi (小白菜) in China.
    • Approximate cost of the main ingredients: £11

    Sunday 6 November 2011

    Cupcake Trio: Lemon, Coffee & Chocolate


    We went to a gathering this afternoon for Risk (the board game) and fireworks. In the past we usually would bring in a dozen of cupcakes from Waitrose. But now I am a baker (well, sort of) so it becomes unacceptable (at least for me) to bring any store-brought cupcakes. What happened was: I woke up at half eight to try out a new recipe which I had been studying for 2 days, with an ambition to bake something French & fancy. By 11am, unfortunately, the whole plan was proven to be a DISASTER. Lesson learnt. Never ever try to attempt any untested recipe for a purposeful bake again. Plus, choux pastry is not easy!

    Overwhelmed with frustration and disappointment, I almost thought maybe I should just go to Waitrose again. Then I suddenly remembered the marble cupcakes I made last month (which I still haven't had time to blog about yet!). That recipe was very easy and reliable. Because I made a Victoria sponge using a similar formula too (which, again, hasn't been blogged yet. Doh!). Looking at the clock, I still got 2 hours. Should be enough. Just enough. Most importantly, I got all the necessary ingredients at home.

    However, I got a personal goal to try out 10 new recipes every month. I just couldn't do the same marble cupcakes again. I need to do something different! How about a marble cupcake trio with three flavours? Yet it's too risky to put three flavours together in one single small cupcake. Wait... Maybe just 3 batches of cupcakes in different flavours? The upside of this idea was... with 3 different cupcakes to choose from, my friends should have higher chance to find something they like from my cupcake basket?

    That's how I ended up in baking 20 cupcakes in 3 different flavours in 2 hours.

    The result was quite pleasing. Everyone loved them. All but two were gone when I left the house after 5 hours. The most impressive thing was, when the host handed the cupcakes to a late-coming friend, the guy shook his head and said, "Nah.. I only like the home-made ones." -- Judging by the look and colour, he thought they were brought from a bakery! And after a bite, he liked it.

    I think I'd love to call it a minor triumph. A very minor one, but still, a triumph.


    Loosely based on:
    "Chocolate Marble Cake" by Emma Lewis on BBC Goodfood.

    Original Ingredients: (Makes a 20cm round cake): 
    • 225g butter , softened
    • 225g caster sugar
    • 4 eggs
    • 225g self-raising flour
    • 3 tbsp milk
    • 1 tsp vanilla extract
    • 2 tbsp cocoa powder

    Original Method:
    1. Heat oven to 180C/gas 160C/gas 4. Grease a 20cm cake tin and line the bottom with a circle of greaseproof paper. If you want to make life easy, simply put all the ingredients (except the cocoa powder) into a food processor and whizz for 1-2 mins until smooth. If you prefer to mix by hand, beat the butter and sugar together, then add the eggs, one at a time, mixing well after each addition. Fold through the flour, milk and vanilla extract until the mixture is smooth.

    2. Divide the mixture between 2 bowls. Stir the cocoa powder into the mixture in one of the bowls. Take 2 spoons and use them to dollop the chocolate and vanilla cake mixes into the tin alternately. When all the mixture has been used up (and if young kids are doing this, you'll need to ensure the base of the tin is fairly evenly covered), tap the bottom on your work surface to ensure that there aren't any air bubbles. Take a skewer and swirl it around the mixture in the tin a few times to create a marbled effect.

    3. Bake the cake for 45-55 mins until a skewer inserted into the centre comes out clean. Turn out onto a cooling rack and leave to cool. Will keep for 3 days in an airtight container or freeze for up to 3 months.


    My Ingredients: (Makes 20 small cupcakes, each about 4cm across the base):

    For Cupcakes:
      • 150g butter
      • 150g caster sugar
      • 3 eggs
      • 150g self-raising flour
      • 1/4 tsp baking powder
      • 2.5 tbsp milk
      • 1 tsp vanilla extract
      • 1 tbsp cocoa powder
      • 1 tbsp expresso powder
      • 1 lemon, juice & zest  (yielding about 1 tbsp zest)
      • 15g walnut, crushed
      • 18 pieces of chocolate drops or pieces
      For Buttercream & Topping:
      • 90g butter
      • 120g icing sugar
      • 1 tbsp milk
      • (Lemon Buttercream only) extra 1 lemon, 1/2 tbsp milk
      • (Coffee Buttercream only) extra 1 tbsp espresso
      • (Chocolate topping only) Chocolate sauce & mini marshmallows


      My Method:
      1. Heat oven to 170C. Prepare lemon zest & juice. Crush walnuts. Dilute 1 tbsp of espresso powder with 1 tbsp of hot water. Place cupcake cases on two cupcake trays.

      2. Beat the butter and sugar together, then add the eggs, one at a time, mixing well after each addition. Fold through the flour, vanilla extract and 1 tbsp of milk until the mixture is smooth.

      3. Divide the mixture among 3 bowls:
        (For lemon cupcakes) Stir in 1 tbsp of zest, 1/2 tbsp of lemon juice and 1/2 tbsp of milk.
        (For coffee cupcakes) Stir in 15g crushed walnuts, half of the espresso solution, 1/2 tbsp of water.
        (For chocolate cupcakes) Stir the cocoa powder and 1 tbsp of milk.

        Mix well after stirring in the specified ingredients.

      4. Each bowl of the cupcake mixtures can approximately fill 7 cupcake cases to half full. Bake the cake for 22 mins or until a skewer inserted into the centre comes out clean. Turn out onto a cooling rack and leave to cool.

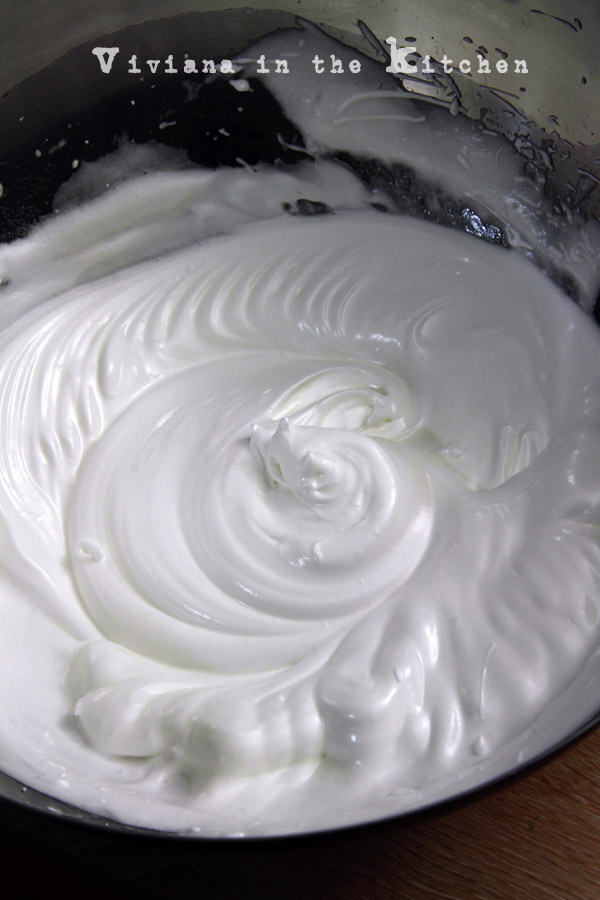
      5. Put the icing sugar & butter into a large bowl, then beat together until light and pale. Divide the buttercream among 2 bowls:
        (For Lemon buttercream) Add 3/4 tbsp of zest, 1/2 tbsp of lemon juice and 1/2 tbsp of milk. Mix well. Then use a piping bag to decorate on lemon cupcakes.
        (For Coffee buttercream) Add the remaining half of the espresso solution, 1/2 tbsp of water & 1 tbsp of espresso powder. Mix well. Then use a piping bag (either another piping bag or after washing) to decorate a coffee cupcakes.
        (For Chocolate topping) Squeeze about 1/2 tsp of chocolate sauce and stick a handful of mini marshmallows on.

      One-line Verdict:
      An easy cupcake recipe derived from from classic Poundcake forumla. Almost fool-proof.

        Note:
        • It's quite hectic to prepare a "Trio" with three different flavours, but I wanted to make sure my friend can find something they love in my cupcake basket, so I just tried my best to come up with three distinct flavours. In fact, it just took me a little bit over two hours to finish the whole preparation, baking & decoration even I had to wash and wipe the mixer and piping bag after doing each flavour. 
        • I was planning to do a chocolate ganache topping but I didn't have enough time. The marshmallows were a pure improvisation. I wasn't too happy about it. :(
        • This cupcake trio used the classic Poundcake formula with equal proportion of flour, butter and sugar. The texture was rather dense compared with some other cupcakes (such as The Hummingbird Bakery cupcakes) which has significantly higher sugar content and less flour. I added an extra quarter teaspoon of baking powder for a lighter texture.
        • For simple butter cream using only butter, icing sugar & milk or water, I usually like to have a 1 to 1 butter-sugar ratio for plain or vanilla butter cream, but this time I increased the sugar ratio by 30% to compensate the sourness of lemon and bitterness of coffee powder. The degree of sweetness, surprisingly, turned out pretty well. My friends loved them.
        • To carry 18 cupcakes with frosting to my friend's home, I used a big 5.5 litre Lock & Lock container which I purchased as part of this set from Amazon. An exact dozen of cupcakes can fit securely in the box without moving around. For the chocolate cupcakes without frosting, I just stacked them into a small tupperbox.
        • Approximate cost of the main ingredients: £6

        Friday 4 November 2011

        Rice-covered Meatballs


        When I saw some other bloggers making this dish (珍珠丸子) on internet few days ago, I immediately knew I'd love to make one. But there were two problems:

        (1) I don't have glutinous rice (糯米, also known as sticky rice) at home and ordinary supermarkets don't sell it. And honestly I don't want to buy a bag of glutinous rice. It's tasteful, no doubt. But for some reason I think glutinous rice(or maybe the overeating of it) can cause me a very bloated stomach.

        (2) Like most other Chinese or oriental recipes, meat ball is typically made of minced pork. Yet my hubby doesn't like pork at all.

        But... those pearl rice balls are sooooo cute! (Aren't they?)

        Therefore I decided to substitute glutinous rice and pork with sushi rice and turkey. The dish turned out pretty good. I think it may not as meaty as the traditional ones using pork, but I think it is a lot healthier. Turkey is an excellent protein source with very low fat percentage. It can be easily found here at very reasonably price too. Guess I am happy enough!

        Modified from:

        My ingredients:
        • 1 cup sushi rice (raw, about 158g)
        • 260g minced turkey
        • 10g dried baby shrimps (蝦米), briefly chopped
        • 10g dried porcini mushrooms
        • 1 tbsp dark soy sauce
        • 1 tbsp sesame oil
        • 1 egg white
        • 1 tbsp Shaoxing wine
        • 2 cloves of garlic, chopped
        • 2 tbsp cornstarch
        • 1 tsp Unami paste
        • spring onion, chopped
        • a pinch of salt
        • white ground pepper
        • curled parsley (optional)
        • gojiberries (枸杞, optional)


        My Method: (Make 16 meatballs, serves 2-4)
        1. Soak the sushi rice in water for about 2 hours. Drain well in a sieve. Pat with kitchen towel to make sure the rice is dry before using.
        2. Soak the dried baby shrimps and porcini mushrooms in water for 10 minutes. Drain and then soak in shaoxing wine again for about 10 minutes. Drain and chop. Keep the shaoxing wine for later use. Chop the spring onions and garlic cloves.
        3. Combine the minced turkey with soy sauce, shaoxing wine, sesame oil, salt, white pepper and garlic in a mixing bowl. Stir hard in a single direction until all ingredients are well blended.
        4. Add dried baby shrimps, porcini mushrooms, egg white, cornstarch and spring onion into the mixing bowl and stir again until well blended.
        5. Boil about 800ml of water and pour the hot water into a pressure cooker (or a large saucepan).
        6. Take about 1 heaped table spoon of meat and form into a ball. Roll the meat ball over the sushi rice until they are completely coated. Continue with the rest of the meat mixture.
        7. Place the meatballs on steamer basket or a perforated steaming inset over a tripod. Steam over boiling water for about 10 minutes when using pressure cooker. Start counting time from the point of closing the lid. Turn off the heat after 10 minutes regardless of the pressure ring reading (should have reached green already). Then wait for another 5 minutes till the pressure comes back to normal. It should take about 15 minutes when steaming in a normal saucepan.
        8. Garnished with curled parsley and gojiberries.

        My Notes

        • Although garnish is strictly optional, I found that the use of curled parsley and gojiberries can improve the depth of the taste. The slight sweetness of gojiberries goes very well with turkey meatballs. Gojiberries can be easily bought in large supermarkets or health food stores such as Holland & Barrett.
        • I used a perforated inset came with my pressure cooker to steam the meatballs. I think it is better than using a plate which may collect too much steam and result in excessive juice in the dish. A steamer basket can also be used.
        • I used a bit of Umami paste bought from Tesco. This is a very new condiment which has only been on the market for about 2 years. It is a flavour enhancer like MSG but without any side effect. Plus, Umami paste are said to be made from ingredients naturally high in "Umami", such as mushrooms, tomato & anchovy.
        • Porcini mushrooms are commonly used in mushoom risotto. It has very strong taste which can be comparable with Shiitake mushrooms. I love to use porcini mushrooms especially when I am in hurry as they are usually sliced before dried. The smaller size makes them rehydrate much quicker than dried Chinese mushrooms -- It took at least 2-3 hours to make dried Chinese mushrooms soften but it only takes 10 minutes for porcini mushrooms. They can be easily found in most supermarkets near other condiments.
        • Approximate cost of the main ingredients: £5

        Wednesday 2 November 2011

        Yoghurt with Fruits


        Nothing fancy nothing challenging. It's not really a recipe but more like an idea of putting common ingredients together and presenting (or attempting to present) it in an artful way. But this yoghurt pot, or yoghurt "flute" since I used a champagne flute, is healthy & delicious. This makes a lovely dessert or an easy breakfast. The idea is versatile and almost any type of fruit can be incorporated. Next time I may probably try bananas, plums and maybe kiwi to make a truly colourful pot.

        My Ingredients:
        • 1 ripe fig, chopped in 16 small pieces
        • 8 blueberries
        • 6 strawberries, each chopped into 4 quarters
        • 8 raspberries, each chopped into 2 halves
        • 6 heaped tsp of vanilla fat-free yoghurt (I used Onken)
        • 1 heaped tsp of manuka honey


        My Method: In a champagne flute, sprinkle the bottom with yoghurt & different fruits in the following order:

        1. strawberries
        2. 2 heaped tsp of yoghurt
        3. blueberries
        4. 2  heaped tsp of yoghurt
        5. raspberries
        6. 2  heaped tsp of yoghurt
        7. fig
        8. 1 heaped tsp of honey 

        King Prawns & Pak Choi with Honey, Lime & Soy


        Original Recipe:
        "Honey, lime & soy king prawns with pak choi" from BBC Goodfood Quick Suppers (Autumn 2011)

        Original Ingredients (serves 4):
        • 16 large raw king prawns, peeled and deveined
        • 1 tbsp dark soy sauce
        • 2 tbsp blossom honey
        • zest and juice from 1 lime
        • 100g or 2 baby pak choi, sliced
        • 2 tsp olive oil

        My Ingredients (serve 1):
        • 190g small raw king prawns
        • 1 tbsp dark soy sauce
        • 2 tbsp manuka honey
        • zest and juice from 1 small lime
        • 1 large pak choi, about 230g
        • 2 tsp corn oil
        • a pinch of salt
        • water

        My Method:
        1. Rinse the prawns and pat with a pinch of salt. Put into fridge for about 15 minutes.
        2. Take out the prawns from fridge and pat dry on kitchen paper.
        3. Pour dark soy sauce, honey, lime zest and juice into a non-stick pan. Bring to the boil, reduce the heat and simmer over a low heat until reduced by half and syrupy (it took me 3 minutes). Remove from heat & set aside.
        4. Wipe the pan with a kitchen paper. Heat over a high heat for 1 min. Add the corn oil and heat for 30 seconds.
        5. Add the prawns and stir-fry over a high heat for 15 seconds.
        6. Add the syrupy mixture and stir-fry for a further 15 seconds.
        7. Add the pak choi and 1 tbsp of water and cover the pan.
        8. Allow to cook for 45 seconds or until the leaves are just wilted (don't overcook the pak choi as its water content will make the sauce too runny). Serve immediately

        One-line Verdict:
        A real quick supper! Honey, lime & soy go really well and gives an oriental hint!

          Verdict:
          • The original recipe asks to slice & stir-fry the pak choi. As I don't want pak choi to feel too oily, I borrowed a "half-fry-half-steam" method previously learnt from this dish.
          • The original ingredients include 2 baby pak choi which on average weigh 50g each. I cannot find (and actually have never seen) any baby pak choi this small. Usually the baby pak choi sold in supermarket weights about 80-120g each.
          • I increased the portion size of the recipe to satiate my craving for pak choi but made the amount of honey lime sauce same as original recipe. I found it quite enough.
          • I didn't slice the pak choi (okay, I FORGOT), so the part near the root were a bit undercooked.
          • Approximate cost of the main ingredients: £4

          Tuesday 1 November 2011

          Carrot Cake


          A little confession time: I never ever liked carrot cake. After knowing today's baking class was about making carrot cake, I was struggling -- Should I just skip the class? Skip another class? I skipped last week's class because it was about donuts -- I don't hate donuts but I honestly can't imagine making half dozen, bringing them home and finishing in 2 days...

          I finally decided to go. Yea. Should really give carrot cake a second chance. I've never made any carrot cake before. Maybe with some modifications, I'd love carrot cake better? Also I'd love to learn how to make marzipan carrots. Christmas is coming, I'd love to make some festive cake with marzipan decorations.

          Therefore I went to the class, back with a box of carrot cakes that I quite liked. :)

          Did I enjoy making carrot cakes? Well. It's not too bad. Will I make carrot cakes again? Definitely!

          ("What carrot cakes? They're homegrown carrots from my garden!")


          Adapted from a recipe used in a baking class held by Tower Hamlet Idea Store.


          My Ingredients: (Makes 1 deep 8" round cake OR 1 shallow 8" round plus 4 cupcakes)
          • 200g self-raising flour
          • 1 heaped tsp baking powder
          • 1 heaped tsp bicarbonate of soda
          • 1/2 tsp ground cinnamon
          • 1/2 tsp ground nutmeg
          • 150g butter
          • 125g muscovado sugar
          • 3 medium eggs
          • about 265g grated carrots (275g raw before peeling & grating)
          • 1 small ripe bananas
          • 30g walnuts
          • 20g pecans
          • a bit of natural marzipan
          • food colourings (yellow and red)


          My Method:
          1. Preheat oven at 170C
          2. Mix the dry ingredients (flour, cinnamon, nutmeg, baking powder, bicarbonate of soda) in a bowl.
          3. Smash the walnuts & peacans by a rolling pin or chop the nuts by a knife. Grate the carrots.
          4. Add muscovado sugar into a mixing bowl. Make sure there is no lump or use fingers to reduce the lumps. Cream the butter with the muscovado sugar until lighter & paler.
          5. Add the well beaten eggs into the butter-sugar mixture in 3 batches, mixing well each time.
          6. Add the dry ingredient mixture into the mixing bowl. Mix well -- it is okay to mix really hard without any fear of over-mixing.

          7. Place the batter in a greased , floured tin and/or cupcake cases. Baking time depends on depth of the tin:
            - All batter in a deep 8" pan: 1 hour
            - Half of the batter in a shallow 8" pan: 45 minutes
            - In cupcake cases (medium ones, not those for muffin nor fairy cakes): 25 minutes

          8. Meanwhile, prepare marzipan carrots. Videos or tutorials can be easily found on Google.
          9. Check the cake is cooked or not by piercing the centre with a clean small knife. It is cooked if it comes out clean. Or press the surface with a finger to see if the cake bounces back.

          One-line Verdict:
          Without the sickly sweet frosting, this homemade version tastes great!

            Verdict:
            • Never a fan of carrot cake. I find it too dense, too moist, too cinnamon-y and too sweet. The original recipe I got from the baking class includes the method to make butter cream topping but I just skipped it. Indeed I love the cake better when it is served alone without any sweet topping. It can be the best carrot cake I have ever had -- not because it's a good bake (I think it wasn't) but because I could and had tailored the cake to perfectly suit my taste!
            • The cake is less dense and a bit airier because of the use of extra leavening agent in self-raising flour. For a more traditional texture (i.e. DENSE, which I don't like), plain flour should be used instead of self-raising flour; levelled (but not heaped) teaspoons of baking agents should be added.

            • Muscovado sugar is moist and lumpy especially when it has been opened for some time. Make sure the sugar is free or almost free of lumps before mixing with butter.
            • The use of pecans and walnuts gives the cake some crunchiness. And the nuts go really well with nutmeg and cinnamon.
            • Marzipan is made of sugar & almond which can be an issue for people with food allergy.
            • Carrots can be replaced by 4 small ripe bananas (so a total of 5) to make a banana cake.
            • Approximate cost of the main ingredients: £4 (can be cheaper if not using nuts especially pecans)